Getting Started
Installation
Option 1: Node-RED Palette Manager (Recommended)
- Open your Node-RED instance.
- Click the Menu (top right) → Manage palette.
- Go to the Install tab.
- Search for
@cgjgh/node-red-dashboard-2-ui-scheduler. - Click Install.
Option 2: NPM (Manual)
Run the following command in your Node-RED user directory (typically ~/.node-red):
bash
npm install @cgjgh/node-red-dashboard-2-ui-schedulerNOTE
Ensure you are running Node.js 14+ and Node-RED 3.0+.
Basic Usage
Once installed, the ui-scheduler node will be available in your palette under the dashboard category.
1. Add the Node
Drag the ui-scheduler node into your flow.
2. Configure the Node
Double-click the node to open its properties:
- Group: Select the Dashboard 2.0 group where the scheduler should appear.
- Name: Give it a label (e.g., "Sprinkler Schedule").
- Size: Adjust the widget dimensions if necessary.
3. Deploy
Click the Deploy button in Node-RED to save your changes.
Your First Schedule
Now that the node is deployed, open your Node-RED Dashboard (usually at /dashboard).
- Locate the generic scheduler widget.
- Click the + (Plus) icon in the top-right corner to open the creation dialog.
- Name your schedule (e.g., "Daily Light").
- Choose a Type (e.g., "Event" or "Timespan").
- Set the Time or Cron Expression.
- Click Save.
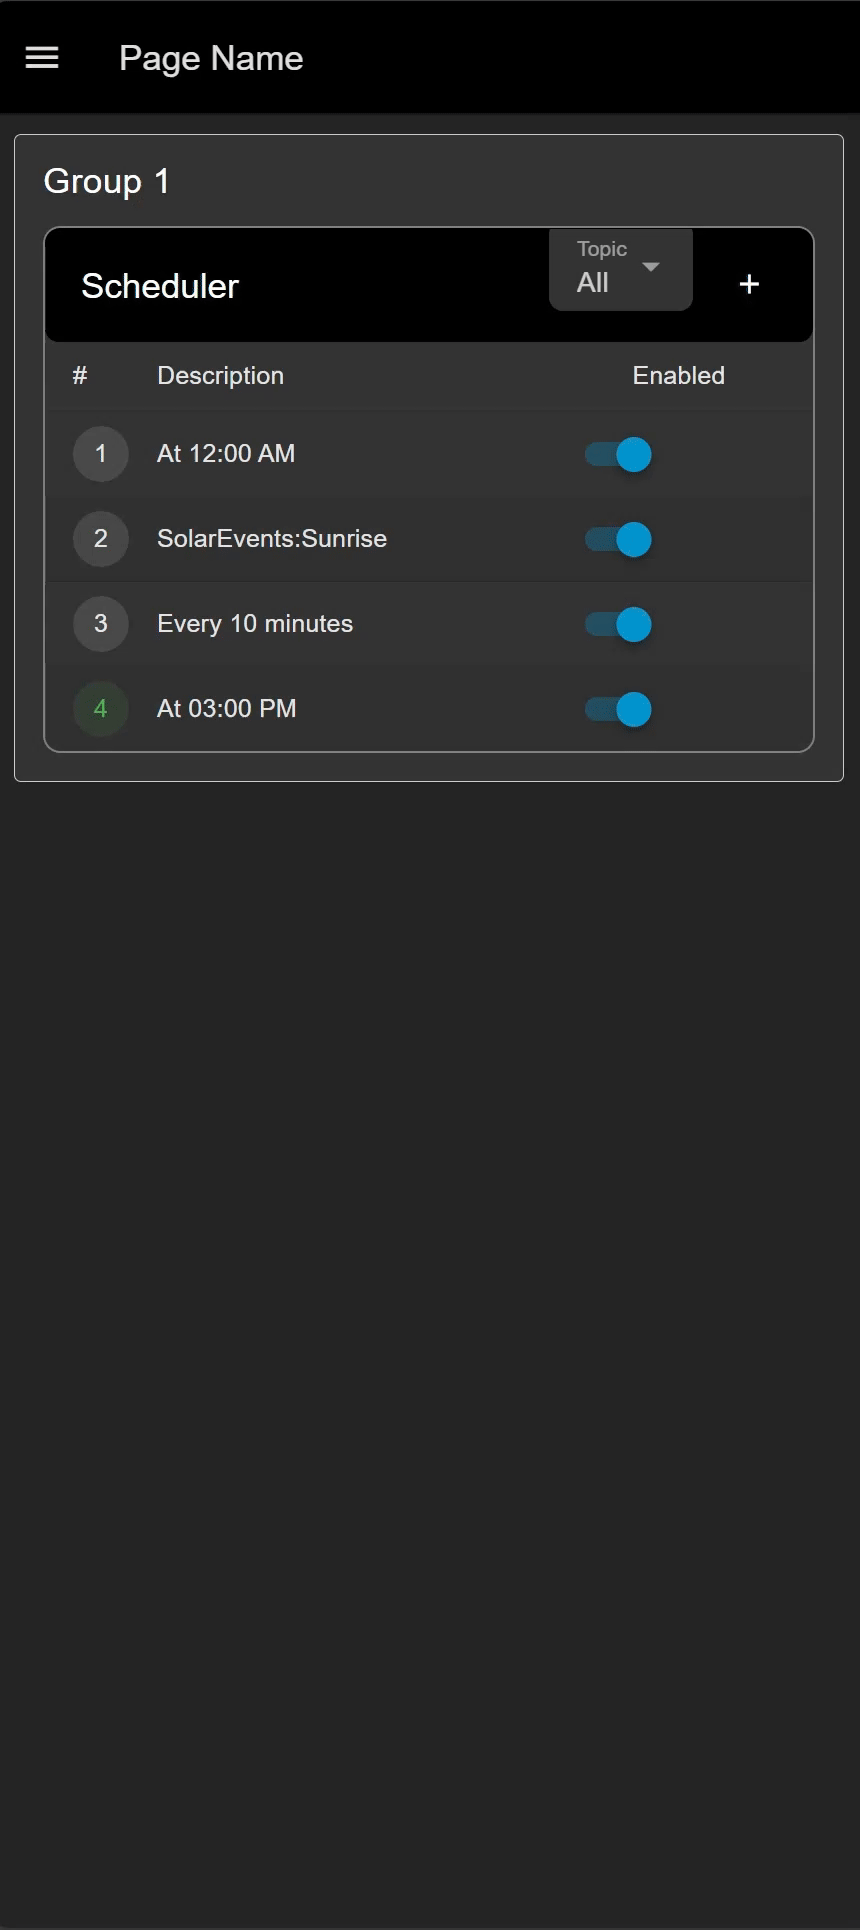
You should now see your schedule listed in the widget!